In this blog post we are going to look at getting Docker working on Azure and deploying a container. If you haven’t heard of Docker, go check out their website at http://www.docker.com/. Docker helps us out in a number of great ways:
- It makes our app portable. We can run a container on any number of hosts—Azure and Amazon to name a few.
- Docker can help provide a consistent environment. No more “it works on my machine”.
- Rapid application deployment. A Docker container can be spun up in a matter of seconds.
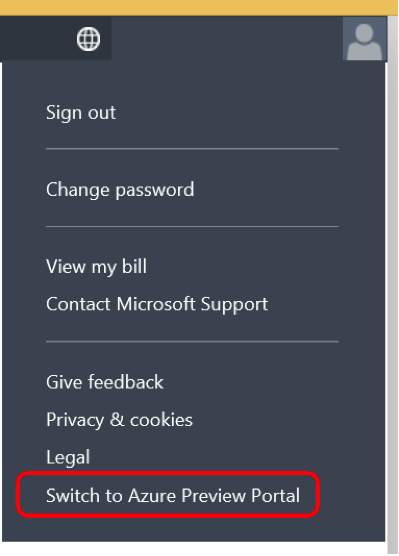
To get started you need an Azure account. If you don’t have one you can sign up here. Now navigate to and sign in to the preview portal.
The preview portal can be reached by clicking on your user name in the portal web page, and it’s the very bottom link on the menu.
The next thing we need to do is create a virtual machine with Docker installed. There are several ways to do this using either Azure PowerShell, Azure CLI tools, or by using the Portal. We are going to use the portal.
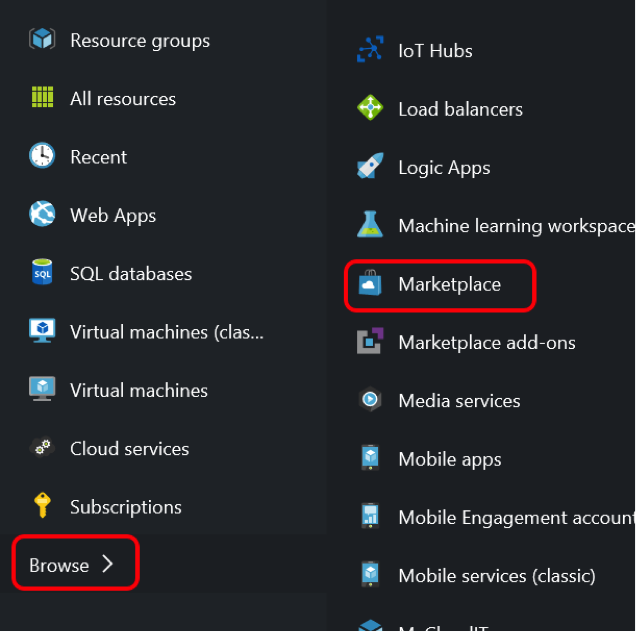
After navigating to the preview portal click on “Browse” and then “Marketplace”.
Next, search for “Docker”. There are a few images available, one that requires base64 encoded certificates and one that allows you to secure Docker after creating the VM. Instructions for generating the certificates can be found here, and will require you to download and install OpenSSL. If you choose to supply the certificates now, remember that they need to be base64 encoded before attaching them in the Azure setup.
We are going to use the one that’s labeled: “Docker on Ubuntu Server” and provide the certificates later. Now click “Create” in the next window.

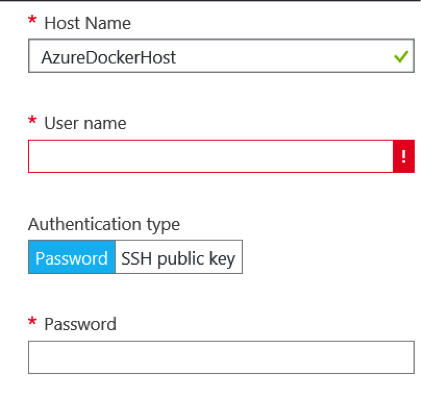
You will be asked to supply a Host Name, and either a username/password or an SSH public key. We are going to use the username/password option for now.
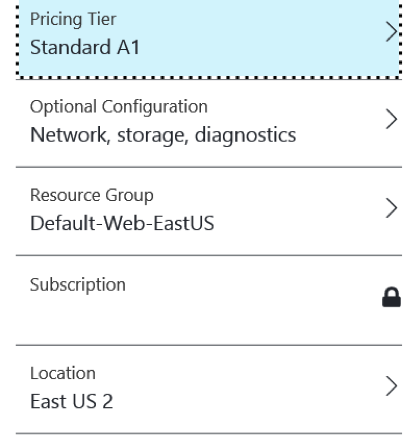
Next you need to specify the size of the VM, the Resource Group and the Location. I used the “Standard A1” VM, and since I’m on the east coast I also chose “Default-Web-EastUS” for the Resource Group and “East US 2” for the Location.
Next click “Create”, and you will be brought back to the main page in the Preview Portal. Now we just wait for Azure to create our VM. This may take several minutes to complete.
Now you should have a VM with Docker installed. At this point, I had to restart the VM before Docker was available, but YMMV (your mileage may vary).
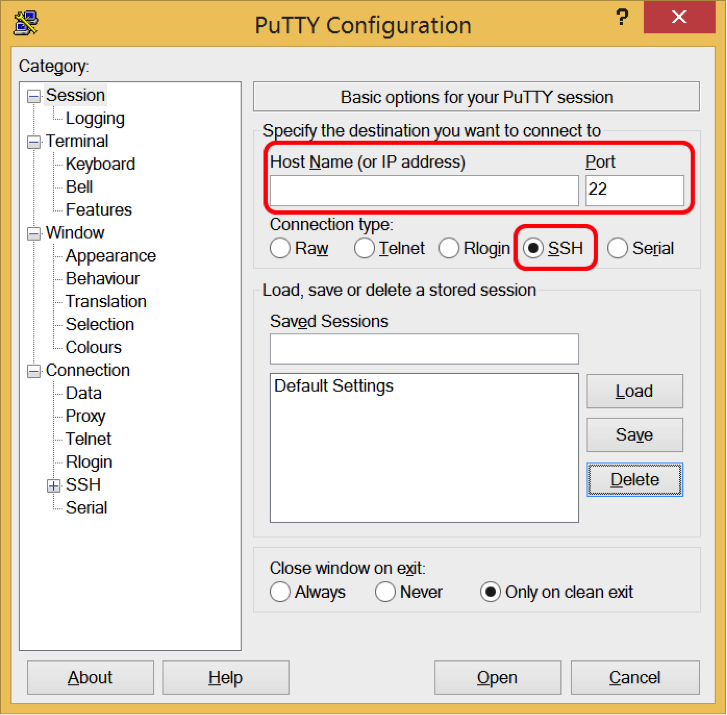
Let’s go ahead and connect to our VM and verify that Docker is installed. To do this you will need an SSH client. I used PuTTY, it can be downloaded and installed from http://www.putty.org/. After installing PuTTY we can connect to our VM.
You will need the host name for the VM, which can be copied from the portal. Select your VM, and then hover over the “Computer Name” to display an icon that will copy the host name when clicked on. Next paste that into the “Host Name” field in PuTTY. Make sure that SSH is selected and that the port is 22, and click “Open”. You will be asked to enter a username/password. These are the credentials we specified when creating the VM earlier.
You should be at a command prompt if you were able to connect. To verify that Docker has been installed, type “docker” and hit enter. You should then see the help documentation for Docker. Now would be a good time to go ahead and generate the certificates and upload them to the VM. You can find instructions for generating the certs here. After generating the certificates you can upload them to the VM using a tool called WinSCP.
Let’s verify our install by creating our first Docker container. While in the PuTTY command window, type the following command to create and run the “Hello World” container.
sudo docker run hell-world
If we’ve done everything correctly we should see a message stating that our installation is working properly. At this point we have Docker installed and running on our VM. Now we can install prebuilt containers from Docker hub and use the VM to deploy .NET applications to a container.
Next steps
- Add prebuilt containers from Docker Hub
- Install Visual Studio Community 2015.
- Install Visual Studio 2015 Tools for Docker.